
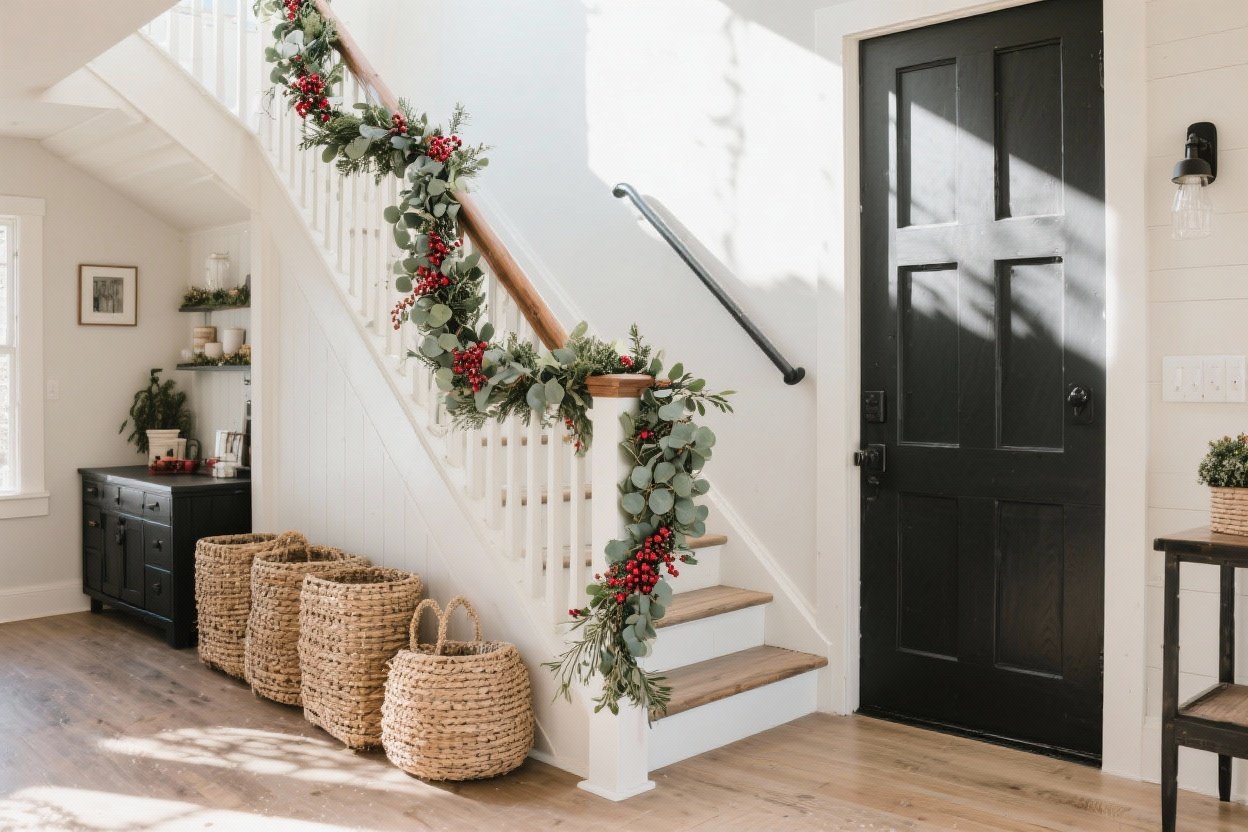
Let’s turn your staircase into a total moment, shall we? If you love that effortless, fresh, slightly festive look without dealing with dried leaves all over your floor, this DIY faux eucalyptus & berry garland is your new best friend. It looks lush, photographs like a dream, and—best part—takes less time than your latest scroll through decor TikTok.
We’re keeping it simple, affordable, and ridiculously pretty. Grab your stairs, some faux greens, a few clips, and let’s make your hallway feel like a magazine cover.
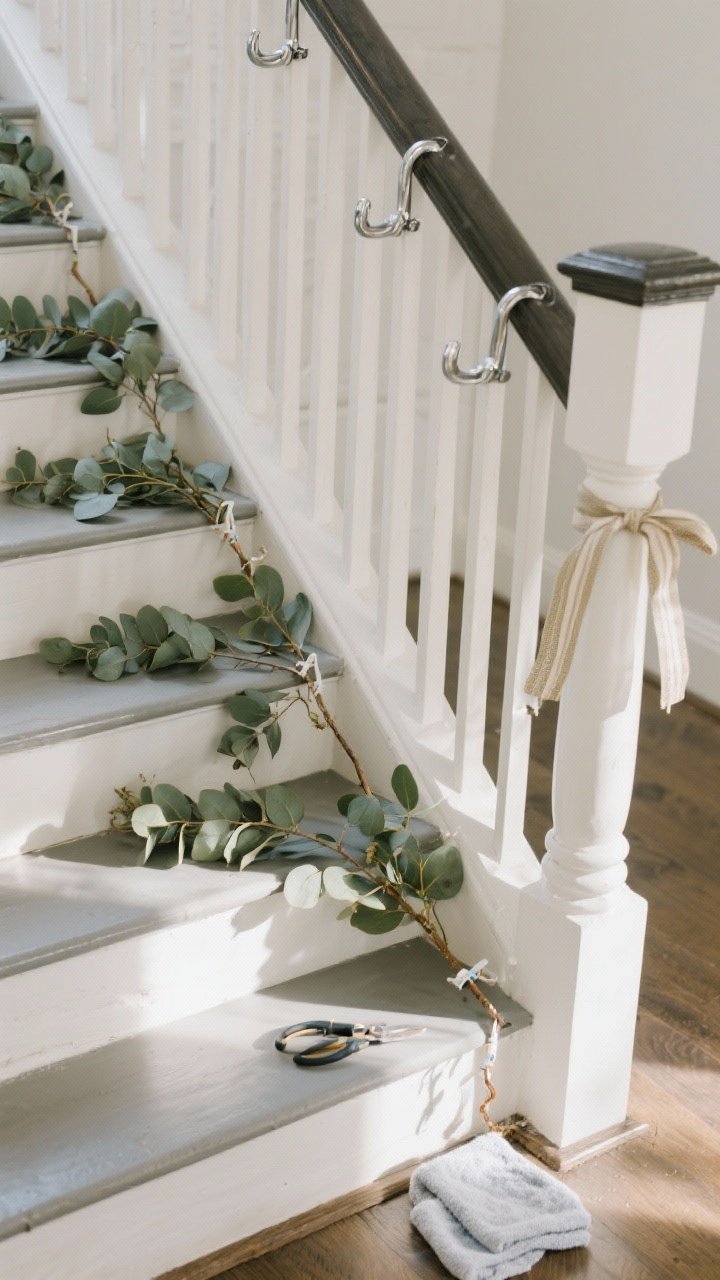
1. Gather Your Gorgeous Supplies (No Guesswork, Promise)
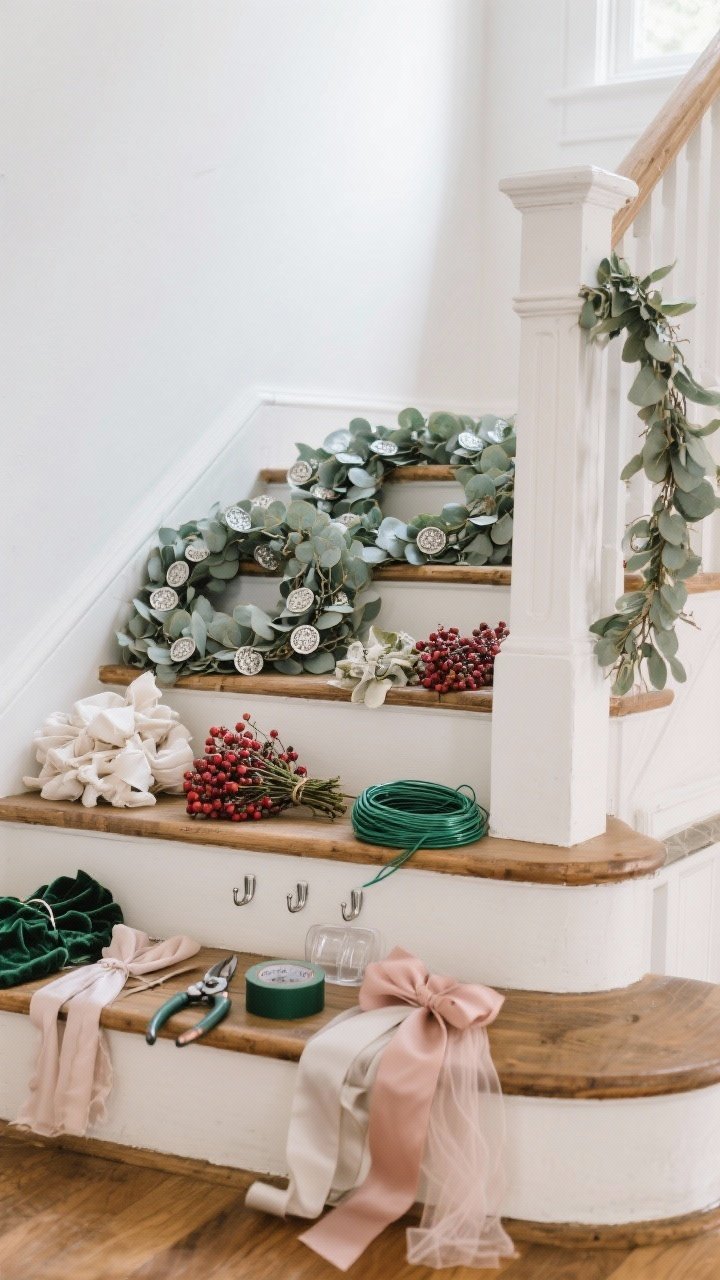
First things first: you don’t need a craft room or a degree in floral design. Just a few workhorse supplies and you’re golden. Here’s what to grab:
Core Materials
- Faux eucalyptus garlands (seeded, silver dollar, or a mix) — 2–3 strands for a standard staircase.
- Faux berries (white, deep red, or muted blush) — choose soft, realistic stems.
- Green floral wire and/or zip ties — for securing without slipping.
- Floral tape — optional, but neat freaks love it.
- Command hooks or banister garland ties — protect your railing from scratches.
- Wire cutters — don’t fight the stems with scissors. You’ll lose.
- Ribbon (velvet, satin, or gauze) — to disguise ties and add polish.
Style Options
- Lights: Battery-operated fairy lights on a wire for a warm glow.
- Accent greens: Faux cedar or olive for texture and contrast.
- Bow or bells: A simple bow at the newel post = instant “designer did it.”
Pro tip: Get real-touch faux eucalyptus if you can. It sits better and looks chic, not plasticky. FYI, mixing two eucalyptus styles instantly makes it feel high-end.
2. Prep Like A Stylist: Fluff, Layer, And Cheat The Length

This is the part that separates a flat-looking garland from the “oh wow, where’d you buy that?” version. It’s all in the prep.
Fluff And Shape
- Fluff every stem so the greenery spreads out and looks airy, not clumpy.
- Bend the garland spine gently to match your railing’s curve and any turns.
- Angle the leaves outward and downward to mimic the way real stems fall.
Measure And Cheat
- Measure your banister from newel post to newel post, then add 20% for swoops.
- Short on length? Overlap two garlands by 6–8 inches and wire them together.
- Layer two styles (seeded + silver dollar) for dimension without buying extra.
Design note: Keep one end slightly fuller for the newel post moment—that’s where your eye lands first.
3. Install The Base Like A Pro (No Slips, No Scratches)
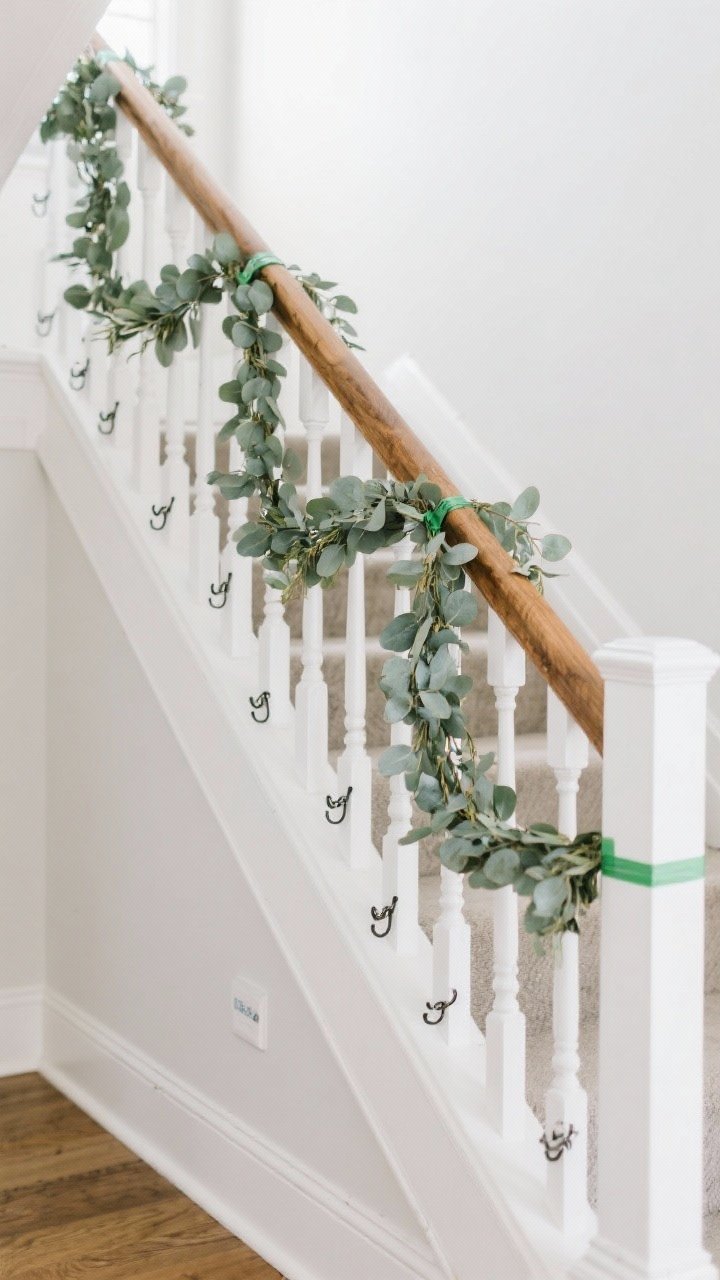
Installation is where most people get stressed. Don’t. We’re using gentle hardware and smart spacing so this garland actually stays put.
Hook It Up
- Place Command hooks or banister ties every 18–24 inches along the railing.
- Angle hooks downward so the garland nestles into the curve and won’t pop out.
- Decide your vibe: clean, taut line or soft swoops every second or third spindle.
Attach The Garland
- Start at the top and work down, securing lightly so you can tweak as you go.
- Use green zip ties or wire to fasten at each hook. Don’t overtighten—let it breathe.
- Hide the ties under leaves; wrap with floral tape if anything shows.
Accident-proofing: If your banister is glossy, add a tiny piece of painter’s tape under each hook for grip. No one will know. We won’t tell.
4. Add Berries, Lights, And Texture For That Designer Look
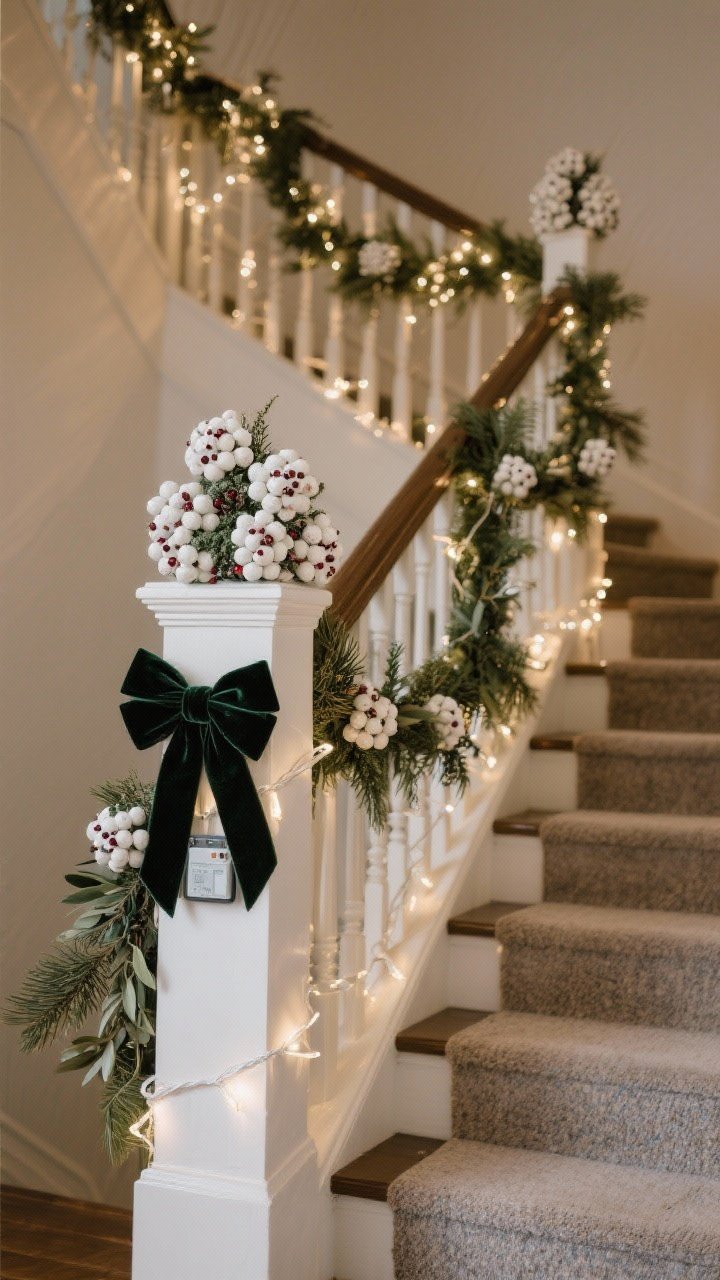
Here’s where the magic happens. The eucalyptus is your canvas; the berries and extras are the brushstrokes. Keep it intentional and slightly asymmetrical so it feels natural, not staged.
Place The Berries
- Cluster berries in groups of three along the garland—one large cluster near the newel post, smaller ones spaced every 18–24 inches.
- Vary heights: tuck some deep, let others pop forward for dimension.
- Wire stems to the garland spine so they don’t spin or droop.
Layer In Texture
- Accent greens like cedar or olive add contrast. Insert in short 4–6 inch pieces.
- Ribbon moments: tie short trailing ribbons at intervals to cover tie points.
- Newel post drama: add a sleek bow or a cluster of bells for subtle sparkle.
Optional: Add Lights
- Use warm-white fairy lights with a thin wire. Wind lightly through the garland.
- Hide the battery pack behind the newel post or in a small ribbon pouch.
- Set a timer to auto-on at dusk. You’ll feel very clever every evening, IMO.
Color strategy: White berries = fresh and airy. Red = classic and cozy. Blush = soft and modern. Choose one and commit for a polished look.
5. Style, Secure, And Keep It Fresh (All Season Long)
Last step: finesse. These tiny tweaks take your garland from “cute” to “publish it on Pinterest immediately.”
Final Fluff And Balance
- Step back and check balance from multiple angles—top, middle, bottom of the stairs.
- Fill gaps with extra sprigs; trim any shiny plastic ends with wire cutters.
- Let it breathe: avoid stuffing every inch—negative space makes it look real.
Secure For Reality
- Kid/pet-proof by adding one extra tie at every third hook.
- Anchor the ends with a discreet zip tie around the newel post, covered by ribbon.
- Check the stairs: nothing should dangle where feet or paws can catch.
Keep It Looking Fresh
- Dust weekly with a microfiber cloth or a quick cool-air blast from a hairdryer.
- Refresh seasonally: swap berries for tiny white blossoms in spring, olives for summer, pinecones for winter.
- Store smart in a long plastic bin. Keep clusters intact to save time next year. FYI: label by stair length if you’re fancy.
Quick Troubleshooting
- Looks flat? Add a second garland layer or more clustered berries near focal points.
- Sliding down? Increase hook count and add a hidden zip tie to a spindle.
- Too busy? Remove every other berry cluster and trim trailing ribbons by half.
Budget breakdown idea: Two mid-quality faux eucalyptus garlands, one berry stem pack, wire, and ribbon usually land under a weekend dinner out—and you keep it year after year.
You did it! Your staircase now looks like it belongs in a styled photoshoot, minus the stress and florist bill. Snap a pic, light the candles, and enjoy walking past your DIY faux eucalyptus & berry garland like you live in a boutique hotel. You’ll be reusing this trick every season—just swap the accents and bask in those compliments.