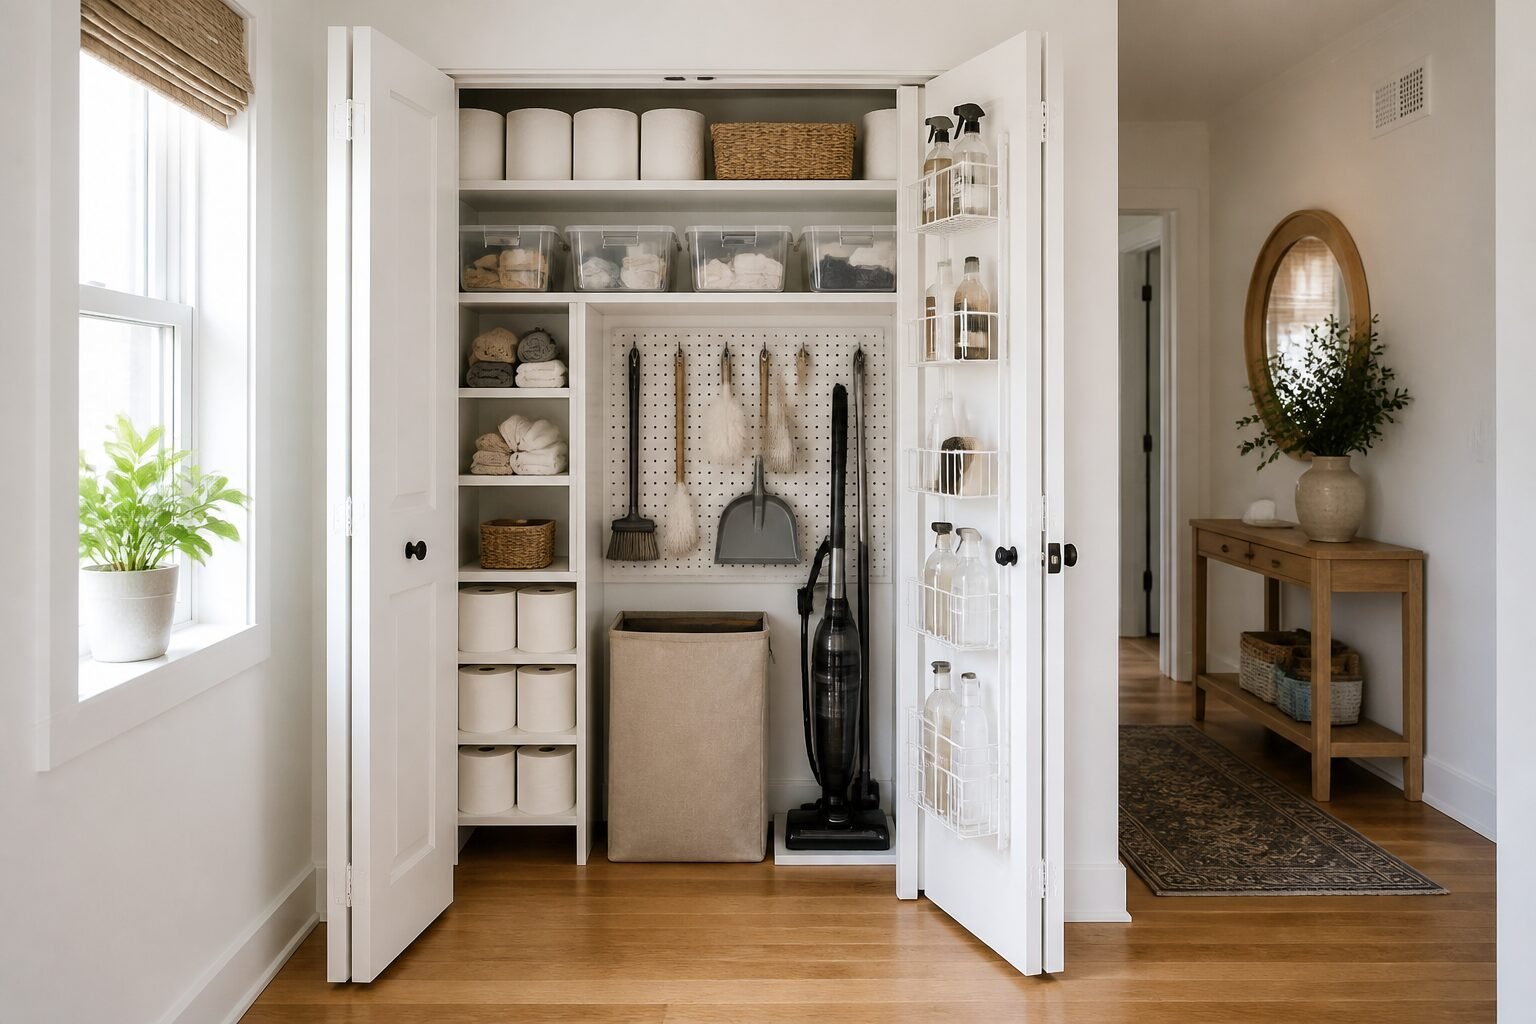
So your hall closet is a chaotic black hole where paper towels, mystery cables, and rogue dustpans go to disappear? Same. The good news: you can flip that disaster into a hard-working utility space you’ll use daily—and actually enjoy opening. I’ll walk you through the exact steps, decisions, and sanity-saving tips pulled from a real closet makeover that went from “please don’t judge me” to “I show friends on purpose.”
Step 1: Face The Chaos And Empty It Out
We all wish for a shortcut. There isn’t one. Pull everything out—yes, everything—and sort it ruthlessly.
Relocate the randos: Items that don’t belong (looking at you, extra shampoo) move to their proper homes.
Wipe down the closet: Vacuum, dust, and give yourself a truly clean slate.
You’ll feel unproductive at first. Keep going. This is where the transformation starts.
Step 2: Measure Like Your Project Depends On It (Because It Does)
Before you buy shelves or bins, measure the space precisely. The entire plan hinges on numbers that aren’t “ish.”
Measurements To Capture
Height, width, and depth of the closet interior.
Door clearance if you plan a door rack.
Anchor zones: Find studs if you’ll mount tracks or standards.
Floor space for tall items: Vacuums, mops, brooms. These drive your shelf heights.
Pro tip: If your vacuum doesn’t fit after installation, you’ll want to cry. Measure once, then measure again. IMO, nothing beats a dry run with painter’s tape to mark shelf heights.
Step 3: Choose A Shelving System That Works Hard
A track-and-standard system (like the Elfa setup used here) turns a narrow closet into a storage ninja. You can adjust shelves, add bins, and change categories as your life shifts.
Why Adjustable Shelving Wins
Flexible heights: Make room for paper towels up top and cleaning bottles below.
Add-on friendly: Hook rails, baskets, and door racks keep small stuff tidy.
Easy to reconfigure: Life changes; your closet can too.
Not into a big spend? FYI, you can mix and match: invest in sturdy shelves, then use budget bins and office file boxes from discount stores. The key is cohesion so everything looks intentional.
Step 4: Install Smart, Not Fast
If you DIY the install, take your time. A top track plus vertical standards makes this easier than it looks, but straight and level are non-negotiable.
Installation Tips
Confirm layout before committing: Place shelves and test-fit tall items before removing stickers or installing accessories.
Use vertical space: Push light, bulky items (like paper towels) to the very top.
Leave floor room: Reserve a dedicated bay for your vacuum and a handheld vac if you use one.
Prefer not to DIY? Many stores offer installers. You can save time or money—but not both. Choose your pain.
Step 5: Categorize Like A Pro
You don’t need 57 categories. You need the right ones. Group by use and frequency, then give every category a permanent home.
Paper and disposables: Paper towels, trash bags, extra sponges.
Refills and filters: Brita filters, soap refills, vacuum bags.
Tools and attachments: Vacuum heads, small hardware, command hooks.
Emergency stash: Flashlights, candles, matches—storms don’t make appointments.
Health and hygiene: Hand sanitizer, masks, wipes.
Keep it obvious so your family can find things and, more importantly, put them back where they belong. Label if needed, but transparent bins serve as natural labels.
Step 6: Pick Containers That Make Sense (And Match)
You don’t need fancy. You do need consistent. Matching bins and baskets reduce visual noise and boost the “I’m organized, thanks for asking” vibe.
Container Guidelines
Go clear when possible: Everyone sees what lives where—zero guesswork.
Use sturdy bins for heavy stuff: Cleaners, tools, and bottles.
Open bins for grab-and-go items: Paper towels, cloths, trash bags.
Door racks for smalls: Lighters, batteries, dusters, tape, and odd bits.
And yes, it’s okay to treat yourself to a new broom, mop, or dustpan that fits perfectly. Form meets function, and your heart grows three sizes.
Step 7: Hang The Daily Workhorses
Vertical space on side walls turns awkward gaps into prime real estate.
What To Hang
Mop, broom, and dustpan: Use clips or hooks to keep them off the floor.
Handheld vacuum: Park it beneath shelves or mount it if possible.
Feather duster: Use a smaller loop or hook so it doesn’t invade your bins’ personal space.
Everything you reach for weekly should live between shoulder and knee height. Save the very top shelf for bulk items and the very bottom for your vacuum.
Step 8: Leave Room To Grow
You know what ruins good systems? Overstuffing on day one. Leave at least one bin or shelf partially empty. Future-you will send a thank-you note.
Final Reset Checklist
Test access: Can you grab cleaner, paper towels, and your vacuum in under 10 seconds?
Check visibility: Can you see what’s running low at a glance?
Tweak heights: Adjust shelves once more after living with it for a day.
Remove stickers and label if needed.
FAQ
Do I need to buy an expensive closet system to make this work?
Nope. The adjustable system helps a ton, but you can mimic the function with budget shelves, a few sturdy brackets, and consistent bins. Splurge on what moves the needle (sturdy shelves, door rack), save on containers and labels. FYI, office file boxes make great budget bins.
What if my vacuum doesn’t fit under the shelves?
Re-work your shelf heights before you finalize the setup. Prioritize the vacuum bay first, then design shelves around it. Worst case, shift one standard slightly or remove a low shelf. Non-negotiable: your daily tools must fit.
How do I decide what categories to use?
Start with what you reach for most, then group by task: cleaning, paper/disposables, refills/filters, emergencies, tools/attachments. If a category holds fewer than five items, combine it with a neighbor.
Is a door rack really worth it?
Yes. It converts dead space into a mini command center for small, slippery items that vanish otherwise—batteries, lighters, tape, dusters, sanitizer. It also keeps messy bits off your main shelves.
How do I keep it organized after the glow wears off?
Make it obvious and easy. Use clear bins, keep labels simple, store daily items at easy height, and do a 2-minute reset when you finish cleaning. Also, leave room for backstock so overflow doesn’t start a junk avalanche.
What should live on the top shelf?
Light and bulky items: paper towels, tissue boxes, extra sponges. Save reachable shelves for liquids and things you restock often.
Conclusion
If your hall closet stresses you out, you don’t need more motivation—you need a plan. Empty it, measure like a pro, install adjustable shelves, assign clear categories, and hang your daily gear where you can grab it fast. Keep bins cohesive, leave room to grow, and enjoy opening that door every single day. Small space, big upgrade—10/10 would reorganize again, IMO.